Beginner's Step-by-step guide on how to insert photos into a Photoshop PSD template
If you’re looking to save money on graduation announcements, save the dates, Christmas cards and so on, read on. For this tutorial, you’ll need Photoshop and a Photoshop template. There are many ETSY shops that provide graduation or seniors templates. If you’re a subscriber to our newsletter, you can download the freebie Photoshop template from our Freebie Library.
This post and the photos within it contain affiliate links. If you purchase something through the link, I may receive a commission at no extra charge to you. Full disclosure here.
Step 1
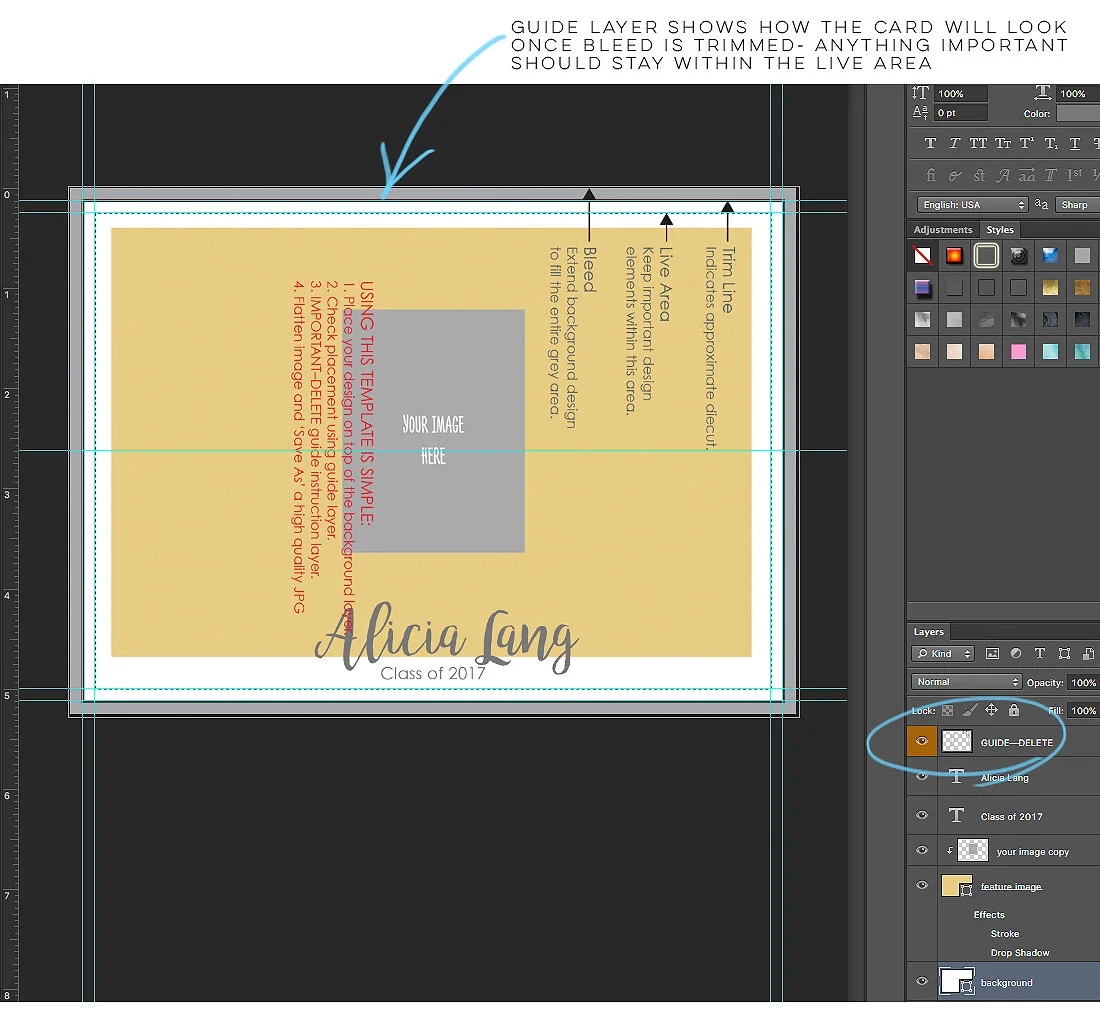
Open up your photoshop template. Turn off the eye icon to the “delete this layer” border. This border shows your approximate trim line. This is important if you have important text here the edge.
Step 2
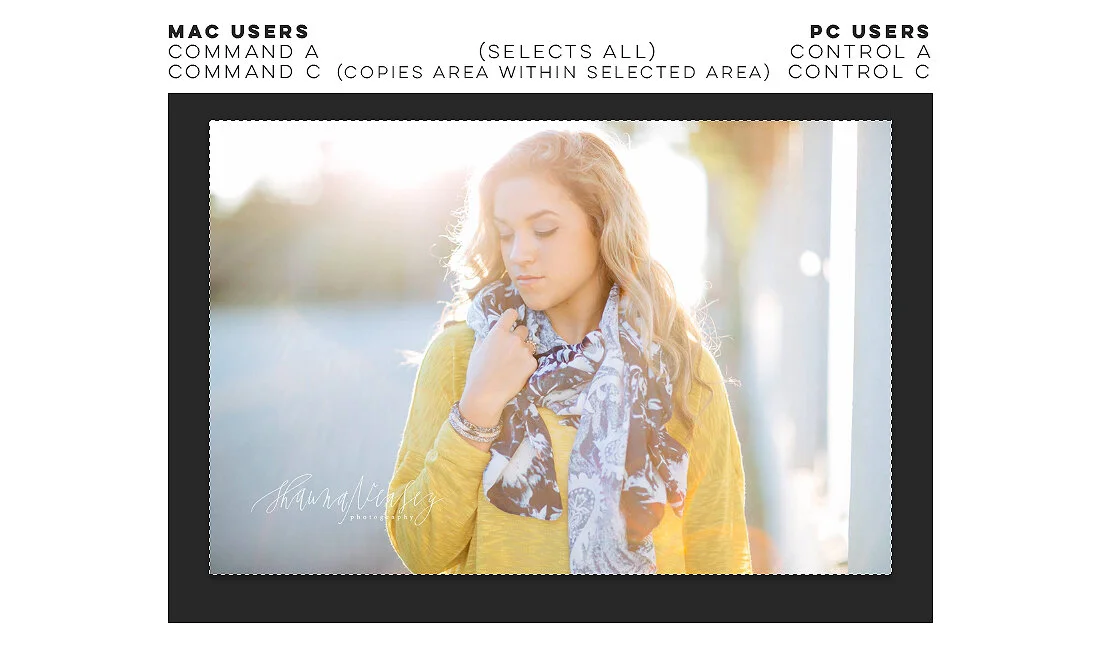
Open the image you want to insert and copy the entire image…see below. Remember Command A/Command C for Mac users and Control A/Control C for PC users.
Step 3
Paste the image into the Photoshop template…be sure to click on the clipping mask shape for it to paste above the clipping mask layer…use Command V (Mac) or Control V (PC users)…see below. It should be between the shape AND the “your image here” layer.
Step 4
Turn off the eye icon to the “your image here” layer…see below.
Step 5
Move your image until it’s where you want it to be. Command T for Mac users and Control T for PC users.
Step 6
Edit in the name, date, text by clicking on the text.
Step 7
Be sure to keep saving the file and rename it to your name.
Step 8
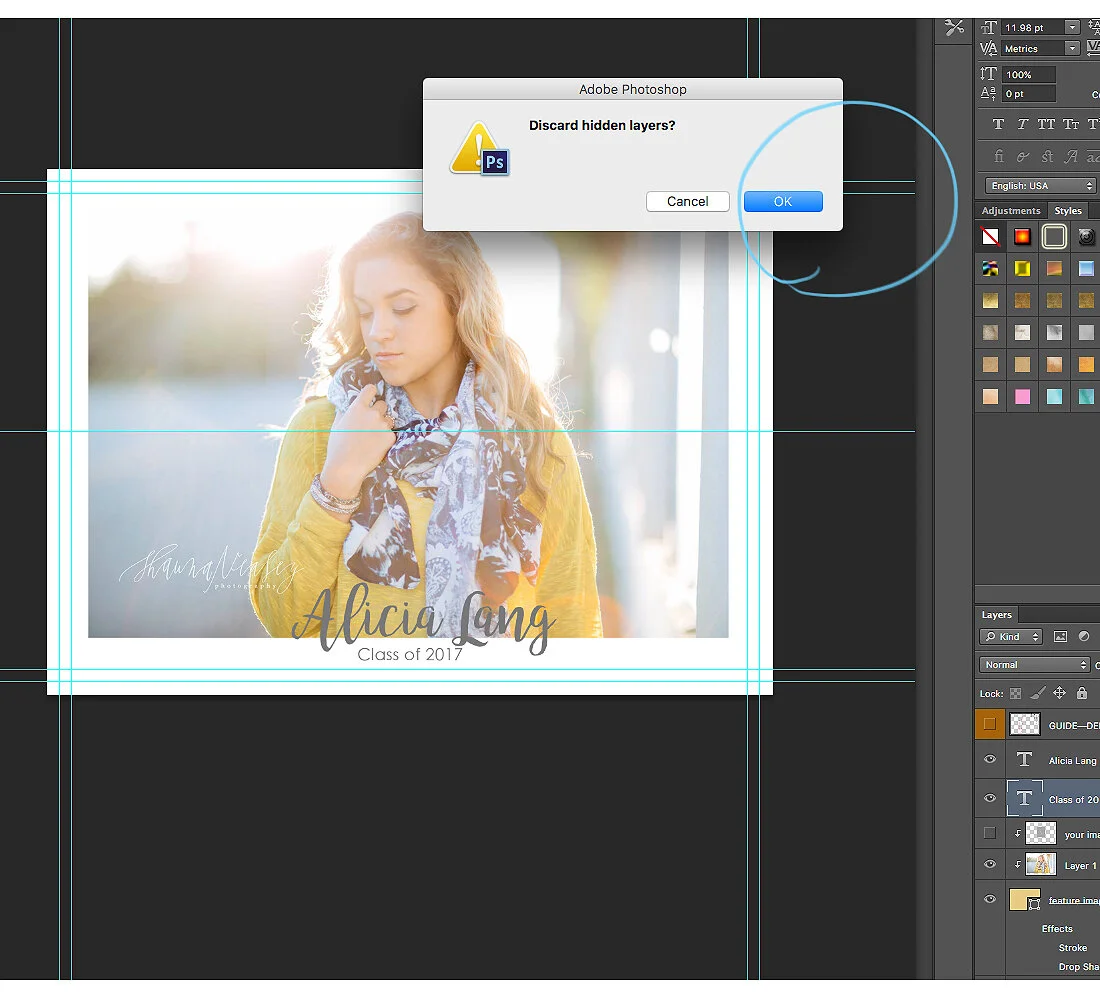
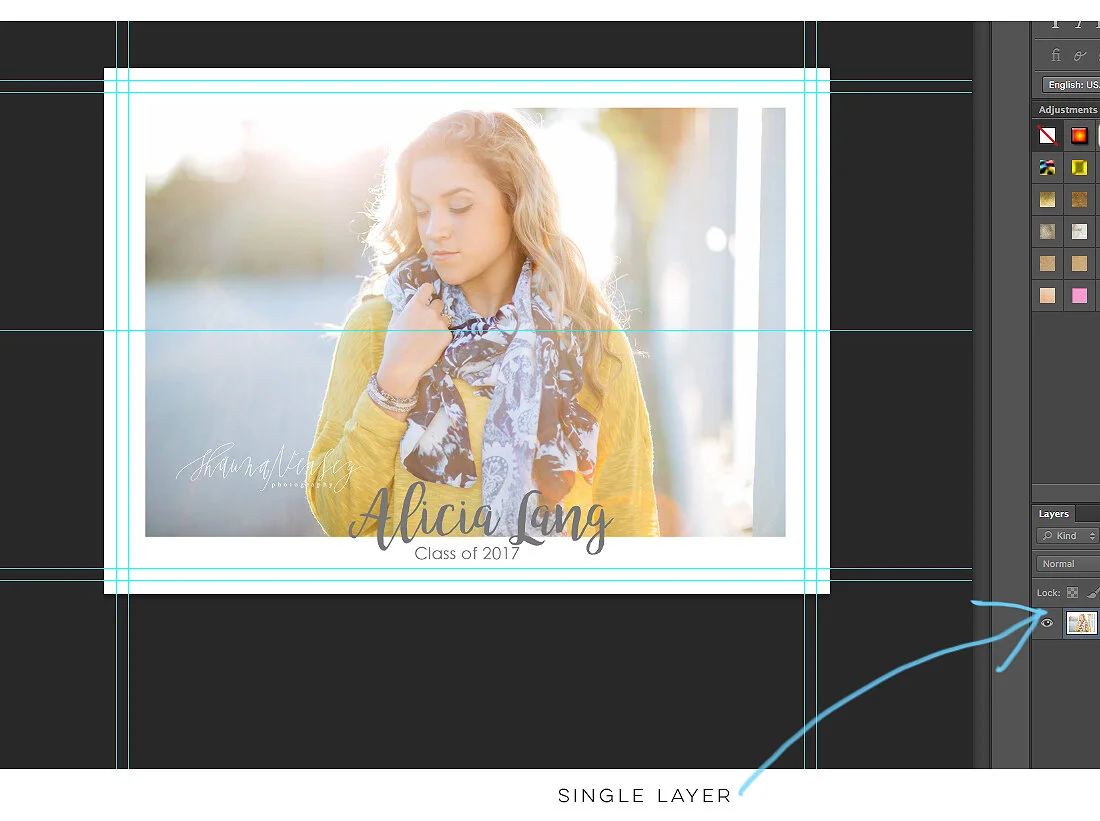
Once everything is perfect, you can flatten the layers by selecting…”Layer”…go to the bottom to…”Flatten Image”.
It will ask if you want to discard hidden layers, click “ok”.
Now it’s in a single layer.
Step 9
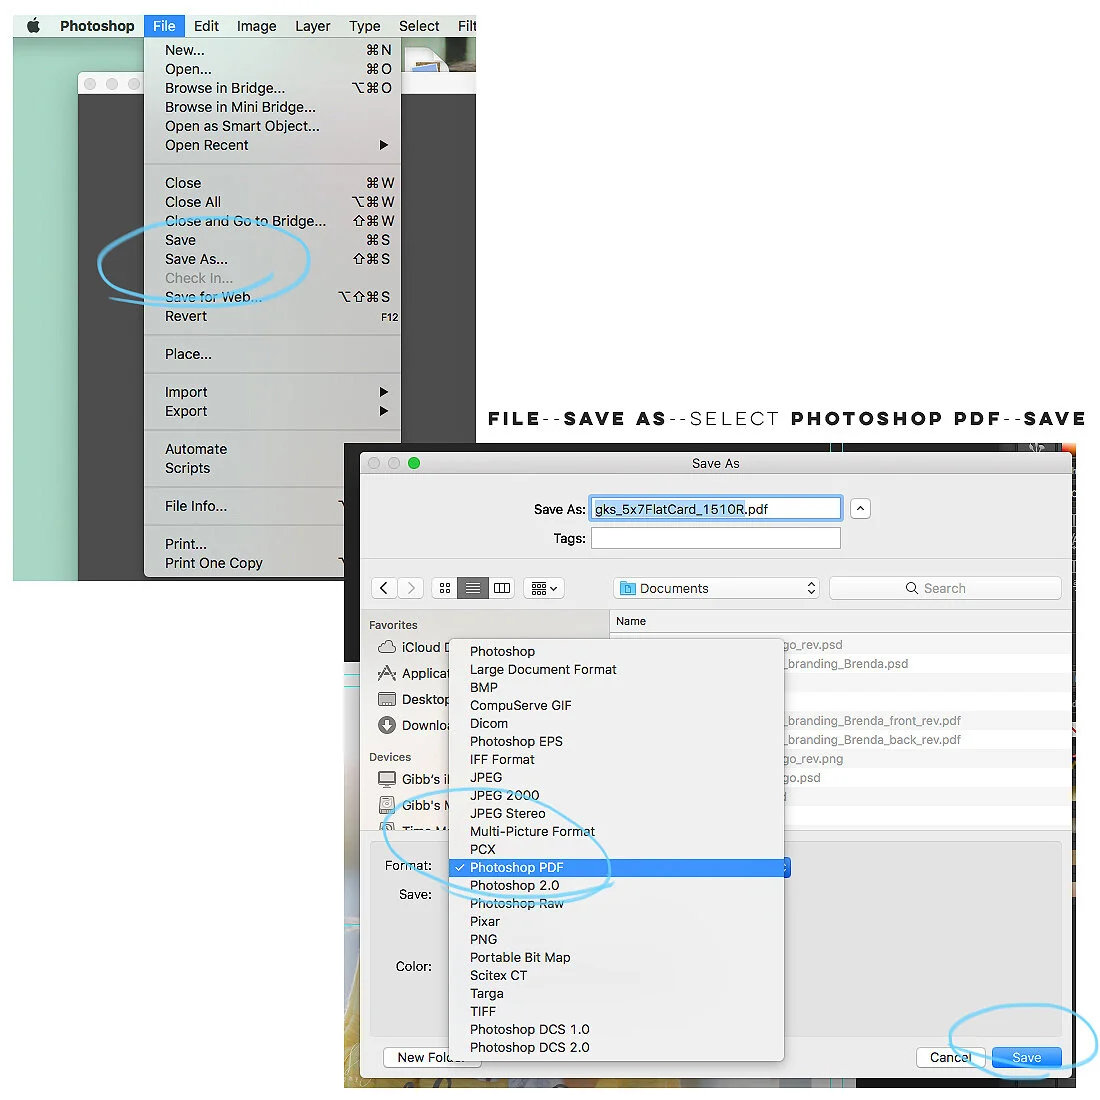
Click “save as” and select the Photoshop pdf format. Be sure to name it with your name.
And that’s it! Pretty easy, right?!
Now you can upload it to your favorite online print vendor.
If you plan to use a professional printer, I recommend Prints of Love. My shop has partnered with them to offer fast, high quality yet affordable printing. Plus free 2-3 day U.S. shipping and free envelopes!
Also be sure to check out my tutorial on inserting a photo into a clipping mask with Photoshop here.
Until next time, happy designing!
Gibb

